Mirrorless camera for vlogging with interchangeable lenses opens up a world of creative possibilities. Imagine crafting compelling videos with the flexibility to switch between different perspectives and zoom levels. This guide dives deep into choosing the right gear, from selecting the perfect lens to understanding video quality and post-production techniques.
This comprehensive guide covers everything from understanding the basics of mirrorless cameras and interchangeable lenses to advanced techniques like using gimbals and post-production editing. We’ll explore different camera types, lenses, accessories, and budget considerations, helping you make informed decisions for your vlogging journey.
Introduction to Mirrorless Vlogging Cameras
Mirrorless cameras are quickly becoming the go-to choice for vloggers seeking a versatile and high-performance recording solution. They offer a unique blend of compact size, impressive image quality, and a wide range of creative control, all while being incredibly easy to use. This makes them a great alternative to traditional DSLR cameras, especially for vloggers who need to be mobile and quick.
Interchangeable lenses are a key advantage of mirrorless cameras. This feature allows vloggers to adapt their equipment to various shooting situations and styles. From wide-angle shots for capturing expansive scenery to close-up shots for detailed interviews, the versatility of lenses expands the creative possibilities.
Mirrorless Camera Features for Vlogging
Mirrorless cameras are designed with vloggers in mind. Key features include high-resolution sensors, fast autofocus systems, and intuitive controls, making them ideal for capturing smooth, well-composed videos. These features allow vloggers to quickly react to changing situations, keep their focus on their subject, and capture high-quality footage without significant delays.
Interchangeable Lenses and Vlogging Versatility
The ability to swap lenses is crucial for vlogging. Different lenses offer distinct perspectives, depths of field, and optical characteristics. A wide-angle lens can capture a broader scene, perfect for showcasing a location or setting. A telephoto lens can zoom in on a subject, ideal for close-ups and interviews. A macro lens provides incredibly detailed close-ups, great for product reviews or showcasing small objects. This adaptability allows vloggers to explore diverse shooting styles.
Comparison of Mirrorless Camera Types
Different mirrorless camera types offer varying levels of performance and features, impacting their suitability for vlogging. The choice depends on the specific needs and budget of the vlogger.
| Camera Type | Pros for Vlogging | Cons for Vlogging |
|---|---|---|
| APS-C | Smaller and lighter, often more affordable, good image quality, excellent for travel and portability. Many excellent lens options at competitive prices. | Slightly lower resolution compared to full-frame, potential crop factor effect on wider shots if not considering it in the planning. |
| Full-Frame | Superior image quality, higher resolution, excellent low-light performance, shallower depth of field for creative bokeh effects, more versatile lens options. | More expensive, larger and heavier, more complex setup compared to APS-C. |
Lens Selection for Vlogging
Choosing the right lens is crucial for capturing compelling vlogs. The lens directly impacts the look and feel of your videos, affecting everything from the framing of your shots to the overall visual appeal. A well-chosen lens can elevate your vlogging from amateur to professional.
The focal length and aperture of a lens significantly influence the types of shots you can capture and the overall style of your vlogs. Understanding these elements is key to achieving the desired visual outcome.
Focal Length and Aperture for Vlogging
Focal length determines the field of view. A shorter focal length (wide-angle) captures a wider scene, perfect for establishing shots or showing the environment. A longer focal length (telephoto) compresses the scene, isolating subjects and creating a more intimate feel, ideal for close-ups. For vlogging, a versatile focal length range is beneficial to accommodate different shooting styles. Aperture, measured in f-stops, controls the amount of light entering the lens. A wider aperture (smaller f-number, like f/1.8) allows more light, resulting in shallower depth of field and a more blurred background, emphasizing your subject. A narrower aperture (larger f-number, like f/8) provides a greater depth of field, useful for keeping the entire scene in focus.
Lens Types Suitable for Vlogging, Mirrorless camera for vlogging with interchangeable lenses
Various lens types cater to different vlogging needs. Prime lenses offer a fixed focal length, often with wider maximum apertures for excellent low-light performance and shallow depth of field. Zoom lenses provide a variable focal length range, allowing you to quickly adjust your framing without changing lenses. Macro lenses excel at close-up shots of small subjects, useful for product reviews or detailed demonstrations.
Image Stabilization and Handheld Vlogging
Image stabilization (IS) is a game-changer for handheld vlogging. It significantly reduces camera shake, resulting in smoother, clearer videos. IS is especially important for vlogging, where stability is crucial for maintaining a professional look. Lenses with robust IS systems allow for steadier handheld shots, even in challenging conditions. This translates to a more professional and engaging video experience for your audience.
Lens Mounts and Compatibility
Different camera systems use different lens mounts. Sony E-mount and Canon RF mount are popular choices. Compatibility is a key factor. Ensuring your lens is compatible with your camera system is paramount. Understanding lens mount compatibility is critical for avoiding compatibility issues and ensuring you can utilize your preferred lenses with your camera.
Lens Comparison Table
| Lens Model | Focal Length | Aperture | Image Stabilization | Price (USD) | Features | Reviews |
|---|---|---|---|---|---|---|
| Sony FE 20mm f/1.8 | 20mm | f/1.8 | Yes | $500 | Wide-angle prime, excellent low-light performance | High praise for image quality and sharpness |
| Canon RF 24-105mm f/4L IS | 24-105mm | f/4 | Yes | $800 | Versatile zoom, image stabilization | Solid reviews for image quality and build |
| Sigma 105mm f/2.8 DG DN Macro | 105mm | f/2.8 | Yes | $550 | Macro prime, excellent close-up detail | Favorable reviews for macro capabilities |
Vlogging Video Quality Considerations
Getting the perfect vlog requires more than just a good microphone and engaging content. Video quality plays a crucial role in capturing viewers’ attention and conveying your message effectively. Factors like image sensor size, resolution, frame rate, codecs, and stabilization all contribute to the overall viewing experience. This section dives deep into these elements, providing insights into optimizing your vlogging footage.
Image Sensor Size and Low-Light Performance
The size of the image sensor directly impacts the amount of light it can capture, significantly affecting low-light performance. Larger sensors, often found in professional-grade cameras, tend to produce cleaner images and better detail in low-light conditions. This translates to noticeably better video quality when shooting in dimly lit environments, such as indoors or at night. Smaller sensors, while more compact and affordable, might struggle in these scenarios, resulting in grainy or noisy footage. For consistent, high-quality vlogs, particularly in varying lighting situations, a larger sensor is highly recommended.
Video Resolution and Frame Rate
Video resolution, measured in pixels, determines the sharpness and detail of the video. Higher resolutions, like 4K (3840 x 2160 pixels), offer exceptional clarity and detail, perfect for close-ups and zooming. For most vlogging needs, 1080p (1920 x 1080 pixels) is a good balance between quality and file size. The frame rate, measured in frames per second (fps), dictates the smoothness and fluidity of the video. Higher frame rates, such as 60fps or 120fps, are ideal for capturing fast-paced actions or creating smoother slow-motion effects. However, higher frame rates increase file size. Balancing resolution and frame rate is essential to ensure optimal video quality without excessively large file sizes.
Video Codecs
Video codecs, such as H.264 and H.265, compress video data, reducing file size without significantly compromising quality. H.265, a more advanced codec, generally offers better compression than H.264, meaning smaller file sizes for the same quality. This is particularly beneficial for storage and online sharing. While H.265 is the preferred choice for its efficiency, H.264 remains a widely supported standard, ensuring compatibility across various devices and platforms.
Professional Video Settings for Vlogging
Utilizing professional video settings can significantly enhance the visual appeal and professionalism of your vlogs. Consistent white balance settings, careful exposure control, and thoughtful use of color grading can dramatically improve the overall look. For example, using a custom white balance can ensure accurate colors, regardless of the lighting conditions. Experimentation with different color grading profiles and filters can also create a unique and polished look. These adjustments are critical for maintaining a consistent and professional aesthetic across your vlogs.
Video Stability Factors
Maintaining a stable shot is paramount in vlogging. Camera stabilization systems, like in-body image stabilization (IBIS) and optical image stabilization (OIS), are essential in reducing blur caused by hand movements. A gimbal, an external stabilization device, further minimizes shake, allowing for smooth, professional-looking footage, even during handheld shots. Combining these techniques can dramatically enhance the visual appeal of your vlogs. Consider using a tripod for static shots to ensure maximum stability.
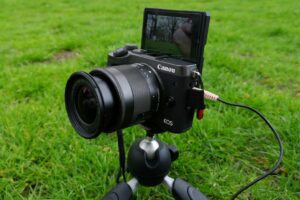
Vlogging Accessories for Mirrorless Cameras

Source: pocketlintimages.com
Stepping up your vlogging game with a mirrorless camera requires more than just the camera itself. A wide range of accessories can dramatically improve your video quality, audio clarity, and overall presentation. Choosing the right accessories is crucial for capturing professional-looking videos that resonate with your audience.
Essential Accessories for Vlogging
Essential accessories significantly enhance the vlogging experience, from capturing high-quality audio to ensuring the camera’s protection and portability. A well-equipped setup allows you to focus on your content and presentation, knowing that the technical aspects are handled.
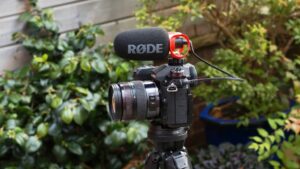
- External Microphones: External microphones are vital for capturing clear audio, free from unwanted background noise. A high-quality microphone significantly impacts the overall quality of your vlogs. Using a lavalier microphone, for example, can capture clean audio even in noisy environments.
- Lighting Kits: Lighting plays a pivotal role in vlogging. Proper lighting can dramatically enhance the visual appeal of your videos, creating a more professional and engaging experience. Natural light is ideal, but supplemental lighting, like LED panels or ring lights, is essential for controlled lighting in various scenarios.
- Camera Bags and Cases: Protecting your mirrorless camera and lenses is crucial. A well-designed camera bag or case provides safe storage and easy portability. Look for cases with padded compartments to prevent damage to your equipment during transport. Consider weather-resistant options if you vlog outdoors.
- Tripods: Tripods provide stability, which is essential for capturing sharp, clear footage, especially when filming in low-light conditions or using longer exposures. A good tripod ensures smooth shots and prevents shaky footage.
External Microphones for Clear Audio
Capturing clear audio is paramount in vlogging. External microphones are essential for achieving professional-sounding audio. Built-in microphones often struggle in noisy environments, leading to poor audio quality. External microphones, like lavalier mics, shotgun mics, or boom mics, are crucial for capturing clear audio free from background noise.
- Lavalier Microphones: These clip-on microphones are small and discreet, making them ideal for capturing clear audio of the speaker without obstructing the view.
- Shotgun Microphones: These directional microphones are excellent at capturing audio from a specific direction, effectively minimizing background noise from other sources.
- Boom Microphones: These are larger microphones that are mounted on a boom arm, offering excellent sound quality and directional pickup, commonly used for capturing audio from a presenter or subject. They offer exceptional audio quality in various situations.
Importance of Lighting for Professional Vlogs
Good lighting significantly elevates the visual quality of your vlogs. Well-lit videos are more engaging and professional-looking, attracting more viewers. Natural light is often preferred, but supplemental lighting is frequently needed. Professional lighting solutions provide consistent and controlled illumination.
- Natural Light: Utilize natural light whenever possible. Shoot during the golden hours (sunrise and sunset) for soft, warm light.
- LED Panels: LED panels offer versatile and adjustable lighting, ideal for various vlogging scenarios. They are often a practical choice due to their energy efficiency.
- Ring Lights: Ring lights provide a consistent and even light source, particularly useful for close-up shots and interviews. They effectively illuminate the subject without harsh shadows.
Camera Bags and Cases for Protection and Portability
Protecting your vlogging equipment is crucial. A well-chosen camera bag or case safeguards your gear from bumps, scratches, and the elements. Portability is equally important, allowing you to move easily between locations. Different vlogging setups may require various levels of protection and portability.
| Type of Bag/Case | Pros | Cons |
|---|---|---|
| Shoulder Bag | Good balance of protection and portability | Can be bulky |
| Rolling Backpack | Excellent portability and space | Can be cumbersome to carry |
| Small Backpack | Lightweight and portable | Limited space for gear |
User Reviews and Comparisons
Finding the right mirrorless camera for vlogging involves more than just specs. Real-world experience, as shared by other vloggers, is invaluable. User reviews offer a glimpse into the camera’s performance in various shooting scenarios, helping you understand its strengths and weaknesses firsthand. Professional vlogger opinions, often backed by experience and knowledge, hold significant weight in evaluating a camera’s suitability for vlogging.
Identifying and Organizing User Reviews
User reviews are a treasure trove of information. To effectively use them, systematically identify and categorize reviews from reputable sources. Look for reviews on popular vlogging forums, camera review websites, and social media platforms. Pay close attention to specific aspects relevant to vlogging, like autofocus performance, video stabilization, and image quality in low-light. Create a spreadsheet or document to record details from each review, including the camera model, reviewer’s experience level, specific positive and negative aspects mentioned, and overall rating. Categorizing reviews by camera model makes comparison straightforward.
Significance of Professional Vlogger Opinions
Professional vloggers often have extensive experience with different cameras. Their insights into camera handling, image quality, and video editing workflow provide valuable context for prospective vloggers. Professional reviews are especially important when comparing cameras for specific vlogging styles. A professional vlogger specializing in travel vlogs might offer unique perspectives on the camera’s performance in challenging lighting conditions or while on the move. Consider their experience level, vlogging niche, and the context of their review when evaluating their insights.
Organizing Frequently Asked Questions (FAQs)
A well-organized FAQ section can streamline the purchasing process and answer common queries. Collect frequently asked questions from vlogging forums, online communities, and direct interactions with potential customers. Group similar questions together for clarity. Answer these questions thoroughly and concisely, addressing the concerns of potential buyers. Use bullet points for easy comprehension and quick reference. For example, common questions might include: “What is the best camera for low-light vlogging?” or “How does the camera perform in different shooting environments?”
Comparing Mirrorless Camera Models Based on User Feedback
Compare camera models based on user feedback by using a standardized method. Establish key criteria relevant to vlogging, such as video quality, autofocus speed, and ease of use. Assign weights to these criteria based on their importance to vlogging. For example, autofocus speed might be more critical for vloggers who frequently switch between subjects, while image quality is important for all. Aggregate user scores for each criterion across different reviews and models. Visualize the results using charts or graphs for easy comparison.
Camera Feature and User Review Comparison Table
A table summarizing key features and user reviews can aid in decision-making. A table like this will compare models and highlight areas of strength and weakness based on user feedback.
| Camera Model | Image Stabilization | Autofocus Speed | Video Resolution | User Review Score (1-5) | User Comments |
|---|---|---|---|---|---|
| Sony Alpha 7 IV | Excellent | Good | 4K | 4.5 | “Excellent low-light performance, smooth autofocus” |
| Panasonic Lumix S5 | Good | Excellent | 4K | 4.2 | “Fast autofocus, good for dynamic vlogs” |
| Canon EOS R6 | Good | Good | 4K | 4.0 | “Reliable performance, good value for money” |
This table provides a concise overview of user feedback, allowing quick comparisons across different models.
Budget Considerations and Price Ranges: Mirrorless Camera For Vlogging With Interchangeable Lenses
Choosing a mirrorless camera for vlogging can feel overwhelming with so many options. Understanding the price spectrum and the features that come with different budgets is crucial to finding the right tool for your needs. Knowing the correlation between cost and features allows you to make informed decisions and avoid unnecessary spending.
Mirrorless vlogging cameras span a wide range of price points, from entry-level models to high-end professional options. This variation in price reflects the range of features, build quality, and performance characteristics available. Factors like sensor size, image processing, video resolution, and lens mount all play a significant role in determining the final price tag.
Mirrorless Camera Models Across Price Ranges
Different price ranges cater to various needs and budgets. Entry-level models offer a good starting point for beginners, while more expensive options provide advanced features for professionals. Consider your current skill level and future aspirations when selecting a camera. Examples include the Sony a6000, a popular entry-level option, and the Canon EOS R5, a high-end choice with superior performance.
Correlation Between Price and Features
The features of a mirrorless camera often increase with its price. More expensive models typically offer higher resolution sensors, faster processing speeds, better video capabilities (like 4K or 8K recording), and improved autofocus systems. For instance, professional models might include features like in-body image stabilization, which significantly reduces the risk of blurry footage. A higher price point often unlocks advanced video controls, such as customizable codecs and internal recording options.
Breakdown of Overall Costs
Purchasing a mirrorless camera system involves more than just the camera body. You’ll also need lenses, accessories, and possibly even software. The total cost depends on the specific models you choose. Lenses, for example, can range from inexpensive standard zooms to specialized high-end prime lenses. Consider the quality and versatility of the lenses in relation to your vlogging style.
Factors Influencing Lens and Accessory Costs
Lens cost is heavily influenced by factors like aperture (the wider the aperture, generally the more expensive), focal length range, build quality, and image stabilization. Accessories like external microphones, lighting kits, and tripods add to the overall budget. The quality of the accessories directly affects the quality of your vlogging videos. For example, a professional-grade microphone can significantly improve audio clarity.
Table of Camera Models and Price Ranges
| Camera Model | Price Range (USD) | Key Features |
|---|---|---|
| Sony a6000 | $500 – $700 | APS-C sensor, entry-level features, good for beginners |
| Sony a7 III | $1500 – $1800 | Full-frame sensor, better autofocus, 4K video recording |
| Canon EOS R6 | $1800 – $2200 | Full-frame sensor, high-speed shooting, 4K video |
| Panasonic Lumix S5 | $1600 – $1900 | Full-frame sensor, 4K video, excellent image stabilization |
| Sony a7R V | $3500 – $4000 | Full-frame sensor, high resolution, advanced video features |
Vlogging Workflow and Post-Production
Vlogging isn’t just about recording; it’s about crafting a compelling narrative. Post-production is crucial for transforming raw footage into polished videos that resonate with your audience. This stage allows you to refine your message, enhance visual appeal, and ensure your vlog stands out from the crowd. Understanding the editing process, optimizing for online viewing, and mastering color grading are essential steps for a successful vlog.
Common Video Editing Software for Vlogging
Several user-friendly video editing software options cater to vloggers. Popular choices include Adobe Premiere Pro, Final Cut Pro, DaVinci Resolve, and more affordable alternatives like Filmora or HitFilm Express. Each offers a different set of features and learning curves. Choosing the right software depends on your budget, skill level, and desired features. For beginners, simpler software like Filmora often provides a good balance of functionality and ease of use. More advanced users may find Premiere Pro or Final Cut Pro’s professional features more appealing.
Importance of Color Grading and Post-Production Techniques for Vlogging Videos
Color grading is more than just adjusting the look of your videos. It’s a powerful tool for creating a specific mood, highlighting key elements, and building brand consistency. By adjusting color temperature, contrast, and saturation, you can make your vlogs visually appealing and consistent with your personal brand. Color grading is not just about aesthetics; it also impacts the emotional response viewers have to your content. A well-graded video can enhance engagement and draw viewers deeper into your vlog.
Optimizing Video Files for Online Sharing
Optimizing video files for online sharing involves several crucial steps to ensure smooth playback and maintain good quality. Compressing files without sacrificing quality is key. Consider using appropriate codecs like H.264 or H.265, which balance file size and visual clarity. Adjusting resolution and bitrate based on the platform where you plan to share your video is vital. A higher resolution isn’t always better, especially if it leads to excessively large files. You should carefully consider the target platform’s specifications to achieve the best results.
Best Practices for Uploading and Sharing Vlogs
Uploading and sharing your vlogs effectively requires careful planning and attention to detail. Choosing the right platform based on your target audience and content type is important. YouTube, for instance, is a popular choice for vloggers due to its extensive reach. Other platforms like Vimeo or TikTok offer alternative avenues. Optimizing file names, titles, descriptions, and tags with relevant s helps viewers discover your content. Adding engaging thumbnails that accurately represent your video’s content also plays a crucial role.
Structured Guide on the Editing Process for Vloggers
A structured editing process streamlines your workflow and improves the quality of your vlogs. Begin by organizing your footage based on scenes and logical flow. Establish a clear timeline to ensure a smooth narrative. Use transitions to connect scenes, and focus on visual storytelling. Add text overlays, intros, and outros to enhance engagement. Include engaging call-to-actions, and maintain a consistent style throughout your video. Testing the finished product on different devices ensures optimal viewing experience for your audience.
Advanced Vlogging Techniques
Leveling up your vlogs requires more than just good lighting and sound. Advanced techniques can elevate your content, creating a more engaging and professional experience for your viewers. Mastering these methods will allow you to tell compelling stories and stand out in a crowded online space.
Using a Gimbal for Smooth Shots
A gimbal is a stabilizing device that mounts to your camera. It counteracts camera shake, resulting in smoother, more professional-looking video. This is especially crucial for handheld vlogs, eliminating jittery footage and allowing for creative camera movements. Gimbal stabilization is particularly beneficial when filming in dynamic environments, like walking through a park or during interviews. It lets you focus on your content rather than battling camera shake.
Creative Camera Angles and Movements
Variety in camera angles and movements keeps viewers engaged. Think beyond the standard eye-level shot. Experiment with high-angle shots to convey a sense of grandeur or low-angle shots to emphasize the subject’s power. Using a gimbal, you can also incorporate smooth pans, tilts, and zooms. For instance, a slow pan across a cityscape while walking can create a sense of movement and discovery. Dynamic camera movements can enhance storytelling and visual interest. For example, during a cooking demonstration, moving the camera to follow your hand as you chop vegetables can add a sense of immediacy.
Incorporating Video Effects
Video effects can enhance the visual appeal of your vlogs. These can range from simple transitions between scenes to more elaborate effects like color grading, filters, and motion graphics. Transitions like wipes, fades, or dissolves can create a professional and polished look. Color grading can evoke specific moods and enhance the visual story. Filters can add a unique aesthetic. For instance, a vintage filter might suit a vlog about retro fashion, while a vibrant filter might complement a vlog about travel. Simple motion graphics can be used to highlight key information, like adding animated text overlays or visual effects to your content. Using a video editing software, you can readily incorporate these effects.
Storytelling in Vlogging
Vlogging is more than just recording yourself. It’s about crafting a narrative. Establishing a clear storyline, introducing characters, and building tension or humor are essential for engaging viewers. Think about the beginning, middle, and end of your vlog. A well-structured vlog keeps viewers hooked. For instance, a travel vlog can follow a journey from departure to arrival, highlighting experiences along the way. A tutorial vlog can start with a problem, introduce the solution, and end with the viewer successfully completing the task.
Creating a Vlog Workflow
A well-defined workflow ensures a consistent and high-quality output. The steps involved in creating a vlog can be organized in a way that is efficient and logical.
- Planning and Scripting: Thoroughly planning the vlog’s content is vital. This includes outlining the topic, creating a script, and researching relevant information. A clear script guides the vlog and ensures a cohesive flow.
- Filming: Filming the vlog involves capturing high-quality video and audio. Using appropriate lighting, a stable camera, and clear audio recording is key. This step involves executing the planned scenes.
- Editing: Editing is crucial for polishing the vlog. This includes trimming footage, adding transitions, music, and effects. Editing should align with the planned content.
- Publishing and Promotion: Publishing the vlog to your chosen platform and promoting it to your audience is vital for viewership. This stage involves distributing the vlog and engaging with your audience.
Final Wrap-Up
In conclusion, choosing the right mirrorless camera for vlogging with interchangeable lenses is a personalized process. Consider your budget, desired video quality, and vlogging style when making your decision. Remember to explore different options, read reviews, and ultimately, find a setup that empowers your creative vision. This guide provides a solid foundation to help you navigate this exciting world of visual storytelling.
Questions and Answers
What are the common video codecs used for vlogging?
Common video codecs include H.264 and H.265. H.264 is generally more widely compatible, while H.265 offers better compression and quality for the same file size.
What’s the difference between APS-C and Full-Frame sensors?
APS-C sensors are smaller, often more affordable, and offer a shallower depth of field, while Full-Frame sensors are larger, providing better low-light performance and a wider dynamic range.
What are some essential vlogging accessories?
Essential accessories include external microphones for clear audio, lighting for professional-looking videos, and sturdy camera bags or cases for protection.
How do I choose the right lens for my vlogging needs?
Consider your vlogging style. Wide lenses are great for showcasing your environment, while prime lenses offer a shallow depth of field for portraits. Zoom lenses provide versatility.